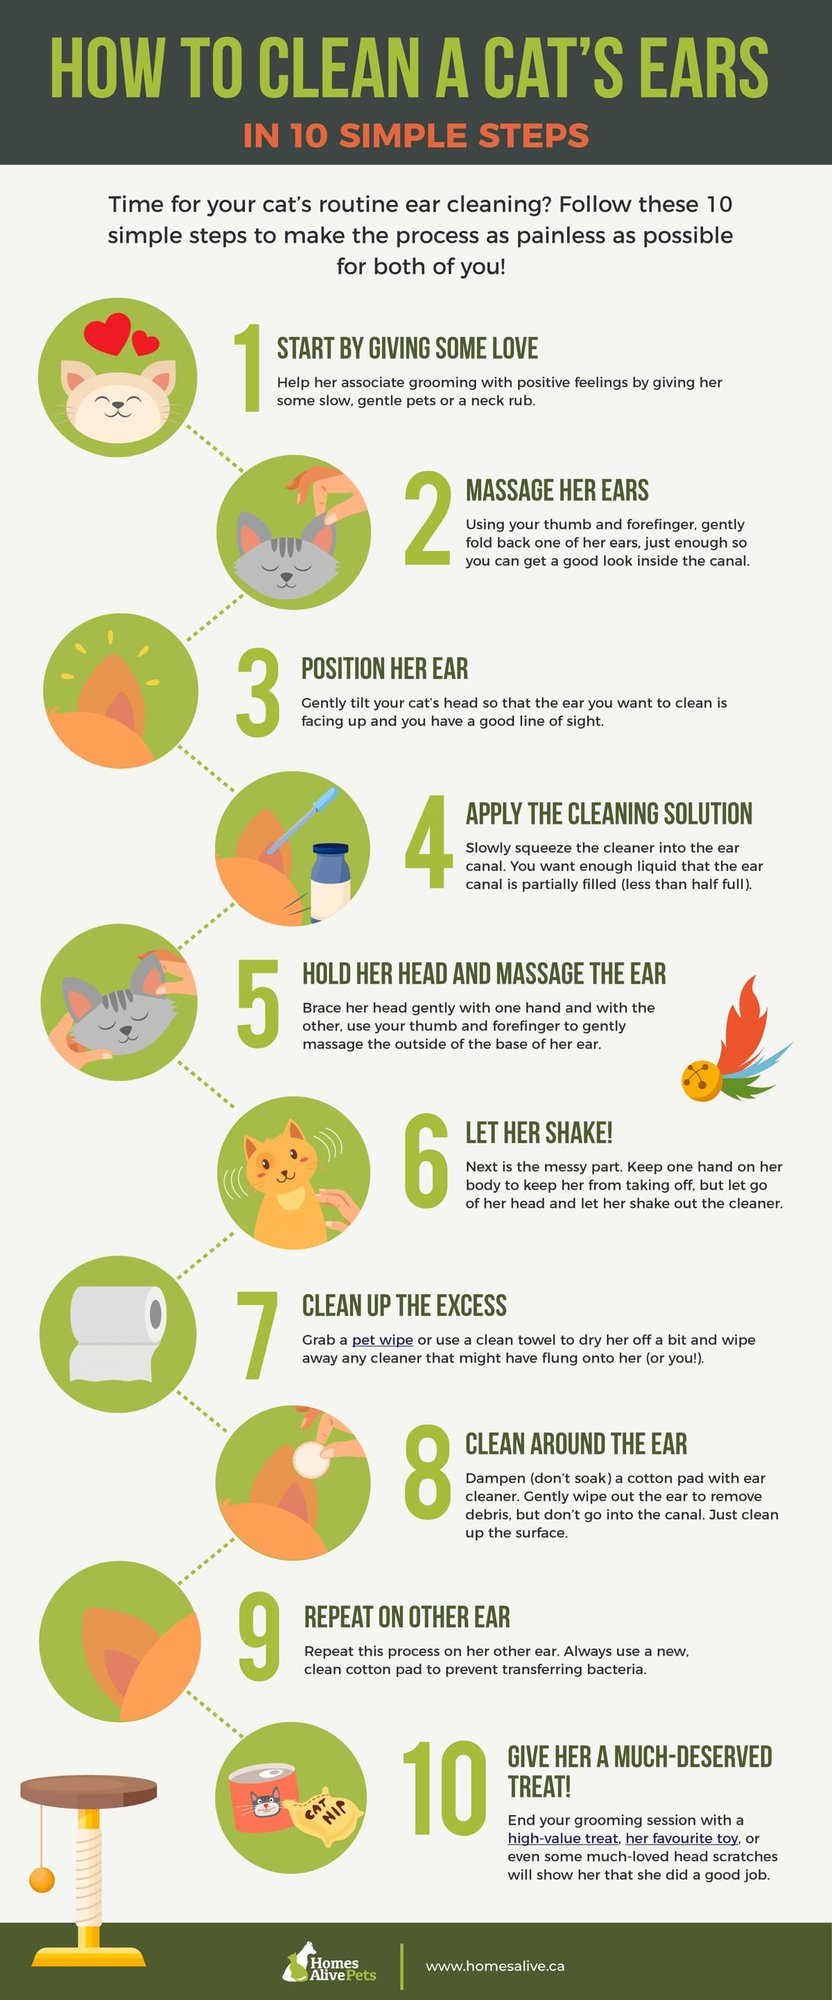
Cat Ear Cleaning Dos and Don'ts
Routine ear cleanings should be part of your cat's grooming routine. Cleaning your cat's ears is a simple process that can help remove bacteria and debris and reduce the risk of infections.
Practice makes perfect, so don't be discouraged if you and your cat are feeling a little nervous the first time you try. To help you make ear cleaning a positive and easy experience, check out these simple dos and don'ts of cat ear cleaning.
Cat Ear Cleaning Dos
- Use a towel to gently restrain your cat. The towelling method, also called the Purrito, is a safe and effective method of restraining your cat.
- Use your hands to warm up the ear cleaner before use. Ear cleaner is naturally cool, so warming the bottle with your hands can make the experience less shocking.
- Pick a spot that is easy to clean. Cat ear cleaning can get messy quickly, so stick to carpet and fabric-free rooms, like the bathroom for easy cleanup.
- Take a break in between each ear. Give your cat some praise, some love, and a few tasty treats to help her destress before you start going again.
Cat Ear Cleaning Don'ts
- Never use Q-Tips to clean your cat's ears. Ear cleaning should be limited to the outer parts of the ear. Inserting anything deeply into the ear can lead to serious damage to the eardrum.
- If the ear looks infected or injured, call your vet before cleaning. The last thing you want to do is make it worse or cause your cat unnecessary pain.
- Skip first aid products made for humans, like hydrogen peroxide. This can dry out the ear and lead to further damage to the delicate skin.
- Don't get angry or discipline your cat. It may be frustrating when your cat refuses to cooperate, but remember that she is confused and scared. Keep your cool and be patient.
.png?width=200&height=66&name=logo%20(1).png "HomesAlive Pets Canada")